Showing posts with label work in progress. Show all posts

Thursday, November 25, 2010

Now that's something I wasn't expecting

Like many writers, I can probably safely say that I work nearly entirely on a computer at this stage of the writing game. Heck, I bought my netbook Hamster for pretty much that specific purpose.

I use my notebooks to plan stories, to do sketches and outlines of what I'm going to write, to make lists of what's in the hopper, to try and write out ideas before I decide to commit to them in a piece of fiction.

But imagine my surprise when yesterday morning I found myself compelled to start on THIS:


That's my moleskine-type notebook and that's my strange handwriting and that's my fountain pen. At the time when I took the photo, very early on Thursday morning, I'd actually managed to do about ten pages of actual WRITING in my notebook. Yes, there are parts where I've crossed out entire lines because, after all, there are no backspace keys when you're actually doing it all in longhand.

You have no idea how much my left hand hurts. I used to be a dedicated pencil-pusher [and I mean that almost literally] and now my hand hurts when I try to put together a grocery list that's about six items long. O how the mighty have fallen! XD

Wednesday, October 27, 2010

Scenes from my university

I recently found cause to write about UP-Diliman, the university that I attended for a few years, in rather elegiac terms in a story.

As that story is supposed to be part of a project where both words and images come together, I took it upon myself to add some references for the artist who will draw my story, and to this end I went out last Sunday to photograph my uni.

Turns out it was perfect weather to take pictures: a blue sky overhead, a sun that was not overwhelming in its light and in fact was a bit moody and muted. There were also not a lot of people on the grounds, which my SO and I attributed to that weekend being the first of the semester break, meaning, everyone might have gone home for a couple of weeks.

He and I took turns with the camera. I'm pretty sure that the third photo is his.


The facade of Ang Bahay ng Alumni features a striking stained-glass half-circle window, which unfortunately is not that obvious in this light. [Hint: it's that massive window with the iron traceries.] The name of the building roughly translates to "The Home of the Alumni".


A look up, up, up the UP Carillon. When we were at uni together we used to spend afternoons listening to the distant songs of the bells as they were rung in this tower. Recently the whole thing has undergone a facelift and it now looks much better than it did ten years ago.


The facade of Palma Hall, also known as AS [Arts and Sciences] and LA [Liberal Arts], depending on your generation, as seen through some of the acacia trees planted along the Academic Oval. Photo by my partner.


A photo of one side of the Academic Oval, taken by me while sitting on the sidewalk opposite Palma Hall. I really like the atmosphere in this photo: it makes us look as though we were the only people in the area. In fact there were a few bicyclists making the rounds - I just got lucky; I took the photo while they were still far away.

For all its flaws and strange idiosyncrasies I still think my uni is gorgeous and a joy to be in. I hope these pictures help convey that.

Thursday, July 15, 2010

Crochet works: yarn for side projects

I'm temporarily setting aside the afghan project to tackle a couple of interesting side projects of the commission type.

Wow, I talk about yarn A LOT on this blog, have you noticed?

And I'm going to talk about it some more with this post, in which I show off some recent acquisitions - each of which has already been earmarked for a specific project.


This dark green yarn is for a special request / commission from my mother. I'm going to try making a pouch for her smartphone, in the same general pattern as my RPG dice bag. The only difference will be the size of the project - she has one of those Samsung QWERTY-keypad phones, and it's kinda large, so I have to adapt accordingly.


This speckled purple yarn was originally intended to be made up into a pouch for my younger sister's external hard disk. [As you can probably guess - yeah, she likes purple. A LOT. The scarf I made for her is just ONE piece of evidence.]

Recently, though, my sister decided to do something else with this yarn instead: she wants it to be an insert in an orange beanie.

And how orange is orange? Well, how about this?


I found this variegated red-orange-yellow-shaded Red Heart yarn at Dreams Yarnshoppe today. It was pretty much the sort of thing I had in mind, so I bought two skeins' worth.


The two yarns for my sister's commission. I think it will be INTERESTING to see how these two opposing colors work up together. This was my sister's idea; I'm just executing it - but I'm pretty sure the resulting photos will be VERY bright. At least that. *snicker*

If I have any of that orange stuff left over I'll make my own version of Jayne Cobb's hat. Gorram it I finally found something that would suit. Shiny!

Friday, July 9, 2010

Slow progress is still progress.

Related posts:
Cross my fingers and hope for the best...
Ripples in my memory, lead me back to you


It turns out that this afghan project is of the "fills in lazy hours" kind. I've woken up at odd times during this week and I've found that spending an hour or so on each three-row stripe of the afghan is very...soothing.

[Of course, I am still not tout a fait happy because the bloody downstairs neighbors have NO concept of peace and quiet. I can hear their voices very clearly even when they are yammering away on the ground floor and I am trying to sleep on the third floor.

Were I a sorcerer, I would either Fireball the lot or, worse, drop a permanent Silence status effect on them. Yeah. And that's just for starters.]

Anyway, I'm not sure if I should be happy with the glacial pace of progress on this thing. I'm shooting for a length of about 60 inches, but have been creeping along so that today I estimated the finished length at about 17 in. Yeah, sure, one-fourth of the way through? At this point the afghan is already large enough to be a nice lap rug.

At least I can try to make up for lost time in the next few weeks.


Is it funny or weird that the more I work on this thing the more I want to give it away? Isn't the opposite more true for crafters - "I'm making this lovely thing for someone else - and I wish I could just keep it for myself"? I don't know. Oh well. Work, work, work!

Wednesday, June 30, 2010

Ripples in my memory, lead me back to you

Related post: Cross my fingers and hope for the best

And so, here we are with in-progress photos of an afghan - my first afghan, an afghan intended for my grandmother.


Having just started on the project, the first four stripes don't look like much.

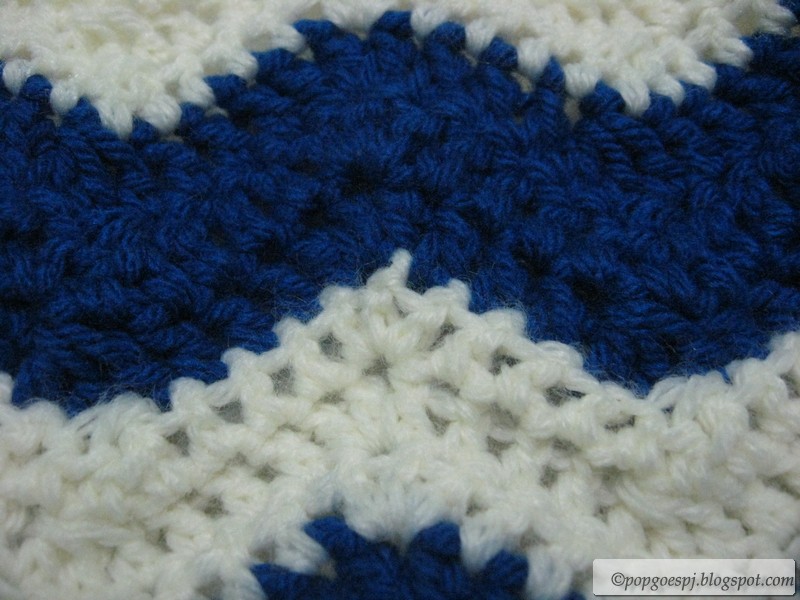
The pattern is based on a chevron / ripple stitch that I got from a stitch library book; it begins with a multiple of 10 chain stitches plus 4. In this case, I've pegged the width of this thing at 100 stitches.

The pattern consists of a sequence of 3 dc + dc3tog [forming the "valley"] + 3 dc + 3 dc in the next stitch [forming the "peak"]. So, yeah, it's not so much a pattern as it is variations on the double crochet - child's play for most crocheters. The thing that makes it different is the sheer *scale* of the thing, I guess.


Close-up on one section of the afghan shows the peak-and-valley pattern.

I'm making this afghan for someone who is quite special to me: my maternal grandmother. Since I was a kid all I ever called her was "Mama". I have to say she and I were quite close while I was growing up. Vigorous, intelligent, and always easy to talk to, she was very popular among both friends and family and was pretty much loved by all.

In 1999 or so Mama suffered a stroke. She got back on her feet, but, well, she was no longer the same. I'm glad to report now though that things are looking up for her: her memory is improving, and apparently her skills at playing mahjong were NOT affected by the stroke.

Some people reminisce fondly about their grandmothers making things for them like blankets or well-worn stuffed toys. I have to smile because in this case I have to reverse the pattern - here I am, working on a present for her.

The idea is to finish this afghan before December so that I can give it to her as a Christmas present. I had to give myself a long timeframe because I can only work on this project during the weekends. I'm either going to finish it with some kind of simple edging or something, or follow tradition and put tassels / fringe on the short edges.

All I can do is keep working, and keep hoping I can finish in time. Slow but sure wins the race.

Saturday, June 26, 2010

Cross my fingers and hope for the best...

In a previous entry I said I'd decided to make my first crocheted afghan out of an assortment of granny squares.

After greedily eyeing some of my pounds of yarn, though, I thought I'd look around for some other options in terms of patterns ad stitches. I figured, hey, two pounds of yarn ought to be plenty from any point of view; if I ate up about three-quarters of each pound and used the rest for edging, then there should be a rather large work completed in the end.

I wound up settling on THIS, or a variation thereof:

[Photo not mine. Wish that yarn was available locally. And I should really save up for those comfort-grip crochet hooks!]

The photo shows just one of the many "chevron" or "ripple" crochet patterns out there. It's a popular stitch for making afghans, hence the many variations on a theme of stitches arranged in a peaks-and-valleys configuration.

When I've made some progress on mine I'll be sure to post pictures. In the meantime, I have to keep working.....

Friday, June 11, 2010

News and notes again

I'm making another one of these, only in a different shade of blue, a different yarn, and a different brim. Not telling you who it's for; it's not a commission either.


Give me another weekend and it shall be done - I hope!

***

Damnit parts of my university burned on Wednesday night! The affected building at UP-Diliman was Palma Hall, a/k/a the building where all the freshmen go. Luckily, no one was hurt. But imagine the property damage! The affected parts were the Chem Pavilion, parts of the Physics Pavilion, and the sections of Palma Hall adjoining those pavilions. *grr!*

***

In a shout-out to a friend - if you have any horror stories about PH electronics retailer CD-R King, kindly point them Every Juan's way HERE.

***

I've spammed my Twitter with this and you might as well know why: Share Moleskine Love! Win a Moleskine SET Twitter contest! And who doesn't LOVE Moleskines? Grab a chance to win them for a friend!

***

Man, Saturday and Sunday just cannot come quickly enough. *grumble*

Sunday, May 30, 2010

Return to the Scarf Project: work in progress

Whenever I make a scarf I tend to think of it as not actually having a pattern at all since I often do it in double crochet, or some very simple combination of very basic stitches.

Where I really go crazy is in the color selection. I'm lucky to now have a sizable yarn stash, with so many possibilities for creation and for crafting coolness.

By request of my sister, who is going away to college to become a professional chef, I've gone back to making scarves. Specifically, THIS one:


It's going to be much skinnier than the other scarves I've made - it's only 13 dc across.

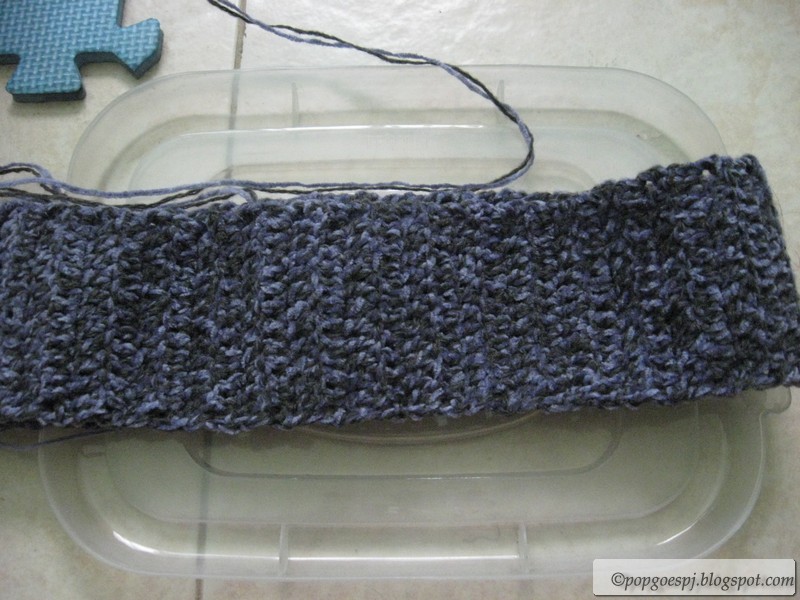
As my sister's favorite color is purple, I'm doing this one in a tweed of purple chenille and dark gray yarns.


Close-up on the colors in the scarf.

I'm shooting to have this finished before June 15, so I guess I have to get a move on - I want it to be at least six feet long and I've only finished a third of it so far.

Tuesday, May 4, 2010

Crafty catch-up

Projects on tap:


1. A lovely and delicate stole made out of several ten- and twelve-pointed stars in crochet. Or I may even make two stoles if I have the time and enough thread. I will definitely give one of them to my mum. I won't be able to complete the stole in time for Sunday, but maybe I can finish it in time for her birthday next month.


2. If you're following the blog's Facebook mini-page, then you know that I am now planning to make my first crochet afghan, assembled entirely out of granny squares. These four squares will be the central motif. The intended recipient for this project is Mama, who is my mum's mum [in short, my maternal grandmother]. I cannot wait to see her this Sunday, and then to get started on her afghan.

3. Not exactly a crochet project, but I am planning to upcycle a few old tee-shirts into my own crochet hook roll-up keeper. Yes, I do keep them in a nice mesh pouch right now, but they kind of strike against each other whenever I move the pouch or dig in it for a hook. The noises made by the hooks can get on my nerves, and I also worry about their finish and the hook heads themselves - so it might be best to construct something soft and protective.

***

Today is National Star Wars Day! May the Fourth be with you!

Thursday, April 15, 2010

Ten-pointed crochet star - first attempt!


Well, gee, blogger-lady, that post title just says it all, doesn't it?

As soon as I had some free time to work in, I went ahead and made a first attempt at the ten-pointed crochet star that I mentioned in the previous entry.

The amazing thing is that it looks damn GOOD already and I've only done two rounds of the ten points of the star! According to the video tutorial, there should be four rounds of the star points. AND, given enough yarn, it's possible to simply keep on adding star-point rounds to the pattern to make it into something really big and gorgeous!

Just as it is, the star makes for a very beautiful motif, something to build onto or sew onto something else. Although one must be careful - the way the star is constructed, it really will become rather ruffle-y, so it cannot be made to lie flat unless one carefully blocked it.

Another thing I found out while completing this motif was that if done in worsted-weight yarn, it is simply too big to turn into a hair ornament. One motif is enough to wear in the hair as a large accent. I guess I will need a much finer yarn to create a smaller version of this star, such that it becomes possible to wear two or three of them in the hair at a time.

Nevertheless, I am quite pleased with how this first attempt has turned out. I must make more.

Sunday, March 14, 2010

Two by two, scarf of blue

After a whole bunch of scarf projects ranging from the first crochet project I ever completed, a pair of six-feet scarves, and a scarf of the fangiftish persuasion, I'm finally working on making a scarf for myself.


Here's the first end section of the scarf, in Lion Brand Cotton-Ease (Turquoise). Technically this qualifies as a stash-diving project because I had this particular skein left over from the WaoHana Project.


First end section after 18 inches, after which I joined the yarn for the main body of the scarf: Lion Brand Cotton in Navy. After a sufficient length of this (the current target being either 24 or, for preference, 36 inches), I'll re-join the Turquoise Cotton-Ease to do the second 18-inch end section.


The scarf last night. You can see I've already put in a good-sized chunk of the Navy section. The goal here is to make either a six-foot scarf of my very own, or if the yarn falls short, something close to it. If the Navy section measures 24 inches, I'll have a five-foot scarf; if it measures 30, I'll have a five-and-a-half-foot scarf; if 36, six.

I'm not really using a pattern here, I'm just using a stitch I picked up from my copy of the Reader's Digest Complete Guide to Needlework. I suppose there is a pattern to be found in the fact that the scarf is composed of two blocks of blue? (Hence the allusion to River Tam's particular set of Furies in the post title.)

***

Geeky greetings:

> Happy Pi Day!

> Happy birthday, Albert Einstein!

> And gentlemen, please remember to give back to the ladies in your life: today is White Day!

Wednesday, February 17, 2010

The WaoHana Project: Wao's Experiment 626 Scarf - Almost Done

These past few nights have been spent eager-beavering away on the Experiment 626 scarf. I suffered a slight disappointment when I realized that 5 oz of black yarn wasn't quite enough to make the full 40-inch middle section of the project, but cheered myself right back up when I realized I had inadvertently made the first striped section a little longer than it needed to be.

So now the project has proportions of:
23-inch first striped section
36-inch black midsection

And now I am down to the last 6 inches of the second striped section. The full length of this thing will be ... DUM DUM DUM...82 inches! Yay!

Pictures, of course, or I'm just blowing hot air your way, so - wish, command:


Here is the scarf as I began the final six-inch section last night.


And this shot really gives an idea of how damn LONG this thing got. :D Of course I am happy with it turning out this way!

Please don't mind all those long trailing tails of yarn. It's a paranoia thing, I swear. I always leave at least six inches to weave back in. And in several instances in this project the tails are actually LONGER than the width of the scarf, hahaha.

Tonight will be finishing-and-laundering night and that means I will have done a scarf that was NEARLY seven feet long in ten days!

I'm just sorry I didn't start the project sooner. Wao Youka's birthday was Monday! Never mind. I'm sure I can post these off to Japan and have them arrive there well in time for the 28th, which is Hanafusa Mari's birthday.

Thursday, February 11, 2010

The WaoHana Project: Wao's Experiment 626 Scarf

Okay, this one's just a quick picture post, since I'm really only getting started on this monster of a project. And I would laugh to mean "monster" both literally - because what part of seven feet long isn't daunting? - and figuratively, considering all the names that Stitch from Lilo and Stitch got called.


Gantu: What is that monstrosity?
Jumba: Monstrosity? What you see before you is the first of a new species. I call it Experiment 626. He is fire-proof, bullet-proof, and can think faster than a super computer. He can see in the dark, and move objects three thousand times his size. His only instinct...to destroy everything he touches! [laughs maniacally]
Grand Councilwoman: So it is a monster.
Jumba: Eh, just a little one.


Stitch: ALOHA!
Gantu: You're vile! You're foul! You're FLAWED! [smashes hand on Stitch]
Stitch: [lifts it back up] Also cute and fluffy!


I rest my case.

Anyway, on to the photos.


Here's the scarf at the starting point. The idea is to have pink and blue stripes for the ends and then solid black for the long middle section. I plan to do the whole thing in one piece, as opposed to an earlier attempt where I did the scarf in two pieces and then stitched them together.


A macro shot that shows the stitch I'm using to make the scarf. My book calls it "alternate" stitch, and it's composed mainly of putting two single crochet in one stitch and then skipping the next stitch. This has the effect of creating a firm fabric with a leaf-like motif.


Okay, I've finally finished one end here and am now moving on to the main portion of the scarf - the black section, intended length about 40 inches. (A little over that figure is okay.)


And here is the scarf, 26 inches long. This thing is supposed to end up at about 84 inches in length, which is probably LONGER than the person I'm giving it to (and definitely longer than ME). The funny thing is that I seem to be doing 10% of it every day - I'm up to 30% now - and so it will likely take me ten or so days to finish the whole thing. :D

This is my first striped scarf, so I must have gone through three or four techniques to do the color changes. I finally stuck with the simplest and easiest one: finish the row with the first yarn, join on second yarn by knotting it onto the first and sliding the knot up to abut the last single stitch, drop first yarn, do turning chains and resume motif with second yarn.

[Posting frequency has gone up, partly because I'm taking a long weekend off. Ah, the nice oddness of having Valentines' Day and Chinese New Year AND the UP Fair all in one weekend.]

Saturday, February 6, 2010

The WaoHana Project: O-Hana's Sunny Beret: COMPLETE!

This is the second of the two hats I'm making for The WaoHana Project, both intended for giving to Hanafusa Mari. And with the second hat completed, I'm now officially halfway through; now it's time to get started on that seven-foot-long Experiment 626 scarf!

The pattern for this one is Crocheted Cap/Beret by Ed Barrall II. As the pictures will make clear, I decided to make the beret version, so there is no brim on this hat.

Photos ahoy!


This is the beret early on, so the pattern of spirals is not yet very obvious. The nice thing about this hat is that it requires knowledge of only a handful of basic crochet stitches: chain stitch, slip stitch, single crochet, and double crochet - plus a variation on that last one, front post double crochet. This project is ideal for beginners as a first try at making crochet hats.


I've just finished making this beret, and here is the picture of the "inner" side. Again, please excuse the yarn ends - they'll be dealt with after I wash the two completed hats tonight.


And now here is the pattern in the project: a twelve-ray spiral from the center, and scalloping around the edges. This is a very pretty project and I recommend it to everyone!

*whew* Next? (LONG scarf is really intended to be long!)

Wednesday, February 3, 2010

The WaoHana Project: O-Hana's Bobble Beret: COMPLETE!

A story told in pictures:

You saw this photo in the previous post. Detail of the top of the hat.


The pattern was based on Dot Matthews's Bobble Beauty.


I finished the hat last night in a determined burst of energy! Here is the "bottom" side of the hat. Please ignore the strands of yarn nested inside - I'll weave those in after I wash the hat.


"Top" of the hat. I really love how the bobbles give the hat so much character.

I think I'll try to update this post soon with a photo of me WEARING the hat so you know what it's supposed to look like, neh? :D

Monday, February 1, 2010

The WaoHana Project: Getting Started with O-Hana's Bobble Beret

[Hey, look, this is the one hundredth post on this blog! Yay!]


The women in this screengrab from a video are Wao Youka (blue sweater) and Hanafusa Mari (gray sweater). I've mentioned them several times in this blog, under the other Takarazuka Kagekidan posts.

The next series of crochet projects I'm doing has everything to do with these two ladies: namely, I am going to send my first fan gifts EVER to them. I have never done anything of this sort before. But I will take a leaf from their book and believe firmly that nothing is impossible - and so I shall make a few things to send to them in Japan.

I'm going to be making Wao-san a seven-foot-long scarf in blue, pink, and black, colors inspired by her favorite Disney character Stitch; Hanafusa-san will be getting at least one hat. Figuring I'd never made a hat before and that it might take me some time to do, I decided to start with this hat pattern: Bobble Beauty by Dot Matthews.

It's really taking me some time to make just this one hat and there have already been a few tear-out-and-start-over bits (something called "frogging" by knitters and crafters alike, since you have to grin and "rip it" *groan*). Yeah, I can't really be happy about that. How was I supposed to know that following the pattern exactly as written, but with a smaller hook than specified, would create a project sized for a kid? I couldn't even get the small version on over my own head. So, yeah, big mistake number one.

I decided to stick with the small hook because using the recommended size tore up my poor beautiful Lion Brand Cotton-Ease yarn. So in order to resolve the size issue, I added a few rounds to the original pattern. But then I over-increased so that the hat was way too large to be attractively slouchy - big mistake number two, which led to another round of frogging.


This will be the top portion of the hat when it's done. I love the floral motif that all the other rounds radiate from.


This is, I hope, the Goldilocks point of this hat. I think it's reached a good size by now, one that will fit its intended recipient and look cute while doing so. I'll continue working on it over this week.

Even as I continue to work on it, I've learned quite a few lessons from this first hat and hope to carry them with me as I continue my crochet adventures.

Wish me luck with this fan gifts project! I'm really excited and nervous to finish the items and then send them on to Japan. I hope I can get a good deal on shipping.... *crosses fingers*

Friday, January 22, 2010

The Scarf Project 02: His-and-Hers Scarves, Her Version + Prepping for Future Projects

Companion post to The Scarf Project 02: His-and-Hers Scarves, His Version.

The next crochet project I'm tackling is both very easy and very challenging at the same time. I'm making a set of his-and-hers scarves, the intended recipients being my younger brother and his girlfriend. As they'll be visiting from Singapore in late March to help celebrate our youngest sister's graduation from high school and entry into a top-flight cooking school, I'm making these as "welcome home" gifts.

Here is the scarf for my brother's girlfriend in progress. It's 15 stitches wide and is also intended to end up at 80 inches long.


This scarf is in a green-on-green tweed, using a heavy worsted-weight yarn in dark forest green and a light lace-weight one in green-and-gray heather. The challenge is as usual: to tension correctly enough for both types of yarn.


Playing around with a decorative insert led me to making two rows of a really tall stitch, called triple triple crochet. Each insert will be ten rows in from the ends of the scarf, so I'll do a second band.

Future projects below the jump.

Sunday, January 17, 2010

The Scarf Project 02: His-and-Hers Scarves, His Version

The next crochet project I'm tackling is both very easy and very challenging at the same time. I'm making a set of his-and-hers scarves, the intended recipients being my younger brother and his girlfriend. As they'll be visiting from Singapore in late March to help celebrate our youngest sister's graduation from high school and entry into a top-flight cooking school, I'm making these as "welcome home" gifts.

What makes this first of two scarves, the one for my brother, easy? Well, there's only one stitch involved, the double crochet, so it's really more of "no-brainer pattern is a no-brainer".


The scarf is 17 stitches across, for a total of about 5.5 inches; and its intended length is 80 inches.

And right there in the picture is the reason - or rather, reasons - why this is a challenging pattern. I'm using two yarns at once: a heavy gray worsted one and a thin teal-blue lace one. You can see how the pattern lies mainly in the interaction of the two colors:


This close-up also shows a few of the stitch markers that I bought recently; I'm using them in this project to mark off every time I complete ten rows.


I took the third photo in macro mode to show how the two yarns look when worked consistently in double crochet to make a scarf.

The other reason why I'm making my brother's scarf first is because I'm also using it as a gauge/dry run for his girlfriend's version, hence the use of the stitch markers. Since I'm going to do decorative stitch inserts in her scarf, I'll use his as a way of figuring out where and how to place the inserted rows.

I'm making rather rapid progress on my brother's scarf and well I should, the "pattern" being hysterically easy and all. It's just that I have to adjust the yarns every now and then so they go attractively together, and that takes a few seconds every time I make the adjustments. Still, this is very therapeutic work and it makes me feel good to know that my hands are adjusting gradually to this very manual craft.

Onward, then.

Monday, January 11, 2010

Scrunchies and a meditation on crochet-based geometry

[Warning, this post contains mathematics. :D]

My sister is going to be graduating from high school in March, and will hopefully be going on to cooking school after that. Since both her school uniform and her love for cooking require her to keep her longish hair under control, I'm making her a series of gifts that will see much use in the days to come: scrunchies, and quite possibly a headband or two.

In particular, there are these: a set of six hyperbolic scrunchies - three in her favorite colors, three more in black. [I SAID there was math involved, didn't I?]


These photos show two of the three colored scrunchies; I'm making the violet one later, and then the black ones. The pattern is based on Cayenne Boyer's Hyperbolic Scrunchie; I've modified the pattern by taking out the fourth and final round. [Pattern remains © Cayenne Boyer.]

The scrunchies take the form of a hyperbolic plane [see Wikipedia entry on hyperbolic geometry here]. For some reason, the craft of crochet has been used, in particular by the Institute for Figuring, as a way of visualizing this non-Euclidean form of geometry; they're the folks behind the Hyperbolic Crochet Coral Reef, based on the techniques of hyperbolic crochet created by the mathematician Daina Taimina.

In crochet terms, it actually comes down to a definite pattern of increases in a piece made in the round, causing the edges to ruffle up.

I don't claim to understand the math behind the scrunchies I'm making, but it makes for a fascinating crafting experience.

I hope my sister enjoys using these.

Monday, January 4, 2010

The Scarf Project 01: Halfway There

Previous post: Beginning my first crocheted scarf

I spent yesterday, the last day of my holiday vacation, with my boyfriend at UP-Diliman. It being the Sunday before everyone goes back to work, lots of other people were also taking advantage of the breezy weather to catch a last hurrah with their families. There were kids and dogs and people flying kites and a whole bunch of bikers. We sat in the Sunken Garden, watched the soccer and touch football players, took in the air, and talked, and all the while I was happily working on the scarf. Here's where I was when we packed up:


(Apologies for the grainy picture quality; this was taken with the dinky 1.3MP camera on my mobile phone.)

And now, here is the result of three days of on-and-off work on the scarf. I have to say, it's VERY satisfying to have gotten this far already.


That, folks, is the scarf at the halfway mark (and change). The intended length is 60 inches, so I'm really getting there.

There was much celebration in the air before I went to sleep. Having all that progress to show - and I'm not even working full-time on the scarf - has really made me happy. Remember, this is my first project. And it makes me even happier that its intended recipient seems pleased with its looks.

I hope to finish the scarf within the next week, and present it proudly to the boyfriend to wear to...well, to the office, for going out, and for all occasions.

Next projects: a hat for me - preferably a beret, for which I am already shopping for patterns; probably one more scarf for my brother, and a pretty bag for his girlfriend. Oh, and the Jayne Cobb hat. Mustn't forget that!